Creating a project
Creating a project in Intelligent Discovery is the first step toward mapping your system configuration. Each project represents a single implementation for which you want to analyze and generate a test plan.
Selecting a Project Type
Currently, Intelligent Discovery supports one project type:
- Blue Yonder WMS - Configuration choices for Blue Yonder WMS
When you're ready to create a new project:
-
From the main dashboard, click on the "Create New Project" view if it's not already selected.
-
You'll see a card displaying the Blue Yonder WMS project type with its description.
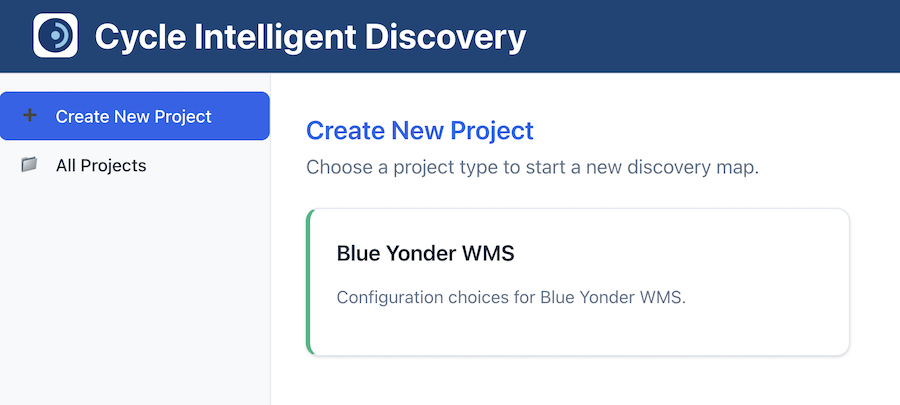
- Click on the Blue Yonder WMS card to begin creating your project.
Filling Out the Project Creation Form
After clicking the project type, you'll be taken to the project creation form. This form collects essential information about your project.
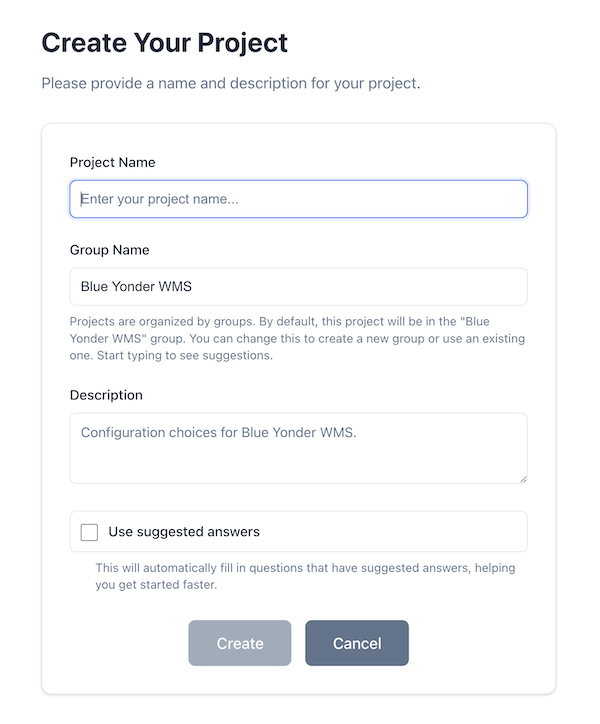
Project Name
The Project Name field is required and identifies your project. Choose a descriptive name that helps you distinguish this project from others, such as "Warehouse A - Main Distribution Center" or "Q4 2025 WMS Implementation".
- Enter a unique name for your project in the Project Name field.
- The field is required and must not be empty.
Group Name
Projects are organized into groups to help you manage multiple related projects. The Group Name field includes autocomplete functionality to help you reuse existing group names.
- By default, the Group Name is pre-filled with the project type title (e.g., "Blue Yonder WMS").
- You can change this to create a new group or use an existing one.
- Start typing to see suggestions from existing project groups.
- If you type a group name that doesn't exist, you can press Enter to create it.
Grouping related projects together makes it easier to manage and compare multiple WMS implementations.
Description
The Description field is optional and provides additional context about your project.
- By default, the description is pre-filled with the project type description.
- You can modify or replace this with your own custom description.
- The description helps you remember the purpose and scope of each project.
Use Suggested Answers
The "Use suggested answers" checkbox allows you to speed up the initial setup of your project.
- When checked, Intelligent Discovery will automatically pre-fill questions that have suggested answers (marked as "likely" answers in the discovery map).
- This helps you get started faster by providing reasonable defaults based on common configurations.
- You can always change these answers later when reviewing each question.
- If unchecked, all questions will start empty, and you'll answer them manually as you progress.
Even with suggested answers enabled, you should review each answer to ensure it accurately reflects your WMS configuration.
Creating the Project
Once you've filled out the form:
-
Review your entries to ensure they're correct.
-
Click the "Create" button to create your project.
-
If you've enabled "Use suggested answers", you'll see a message indicating that some questions have been pre-filled with suggested answers.
-
You'll be automatically redirected to your new project page, where you can begin answering questions.
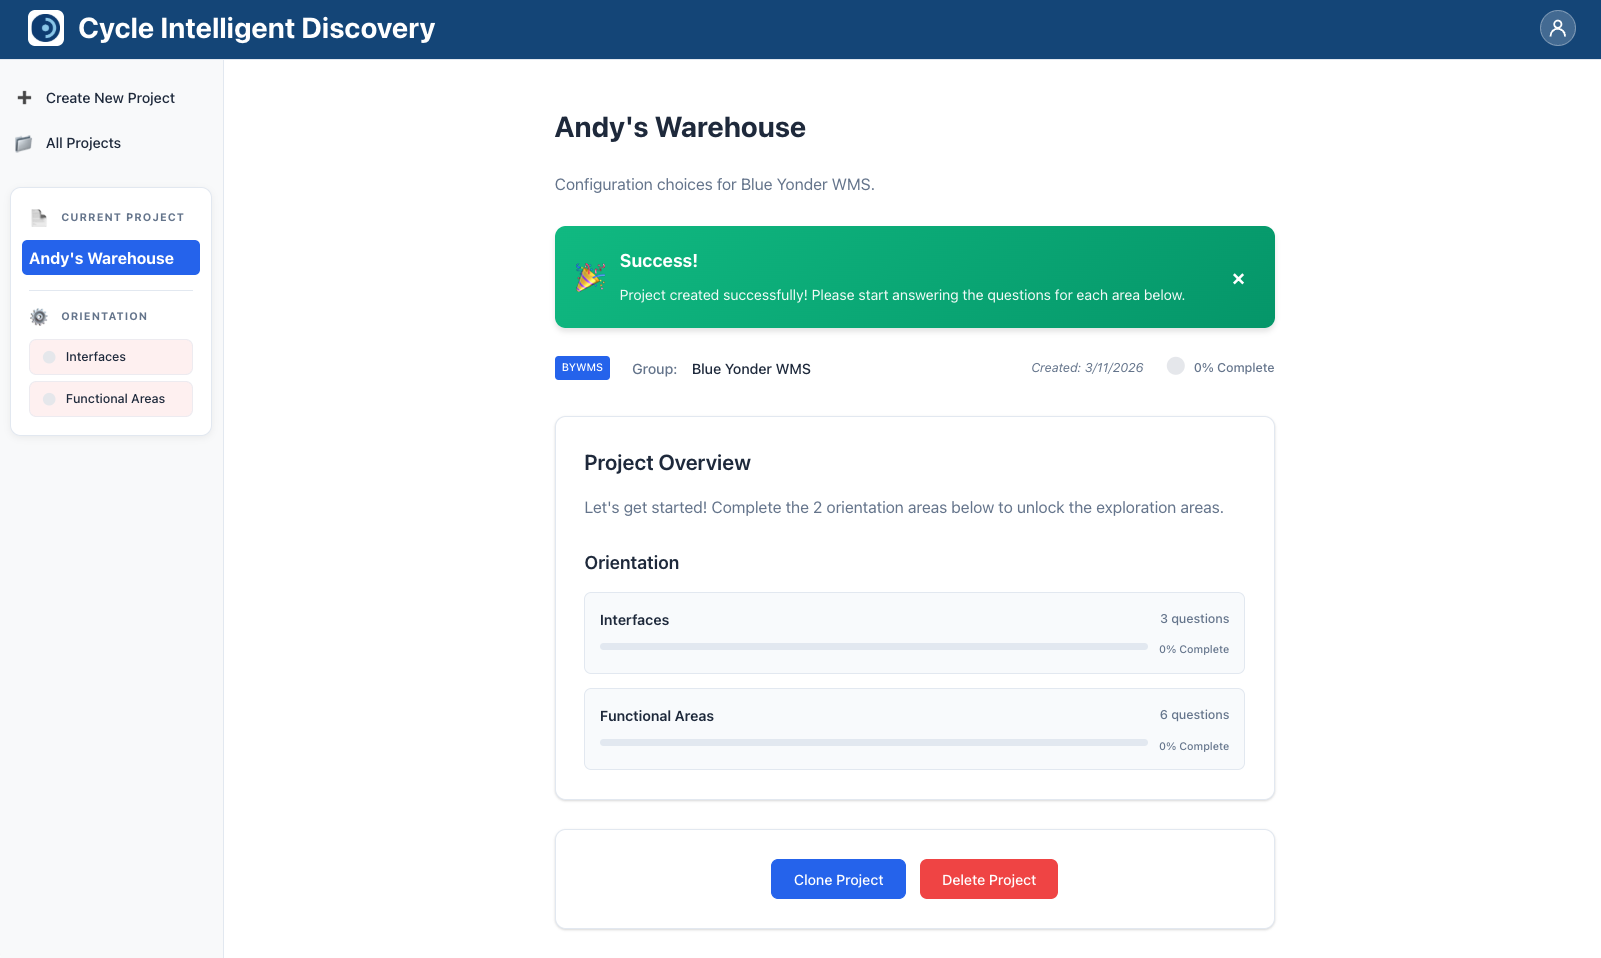
Next Steps
After creating your project, you'll see the project overview page with orientation areas ready to be completed. The next step is to start answering questions about your project, beginning with the orientation questions.