Native App Testing Setup
In order to use Cycle's native app Steps, you need to take the following steps on your machine:
Step 1: Download and set up WinAppDriver in Cycle
Downloading and installing WinAppDriver
You can download WindowsApplicationDriver.msi from Microsoft's GitHub page for WinAppDriver here (v1.1.1 or newer recommended).
When you run the installer, you can either use the default install location or choose a specific one, but be sure to copy the path for later use in Cycle.
In most cases it will be something close to: C:\Program Files (x86)\Windows Application Driver\WinAppDriver.exe
Setting the WinAppDriver location in Cycle's project settings
Once the install of WinAppDriver is complete, open Cycle (version 2.4 or later). Navigate to your project settings from the button at the bottom of the left-hand Project Directory panel. Drill into Execution Settings and scroll to the very bottom:
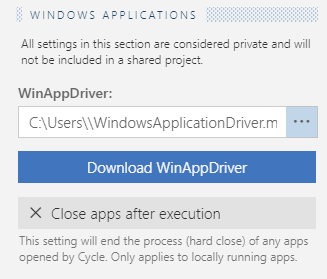
Either paste in your copied file path (including \WinAppDriver.exe) or click the 3 dots to navigate to it through Windows Explorer.
You will now be able to execute the family of Steps identified in the Step Guide with the WinAppDriver filter.
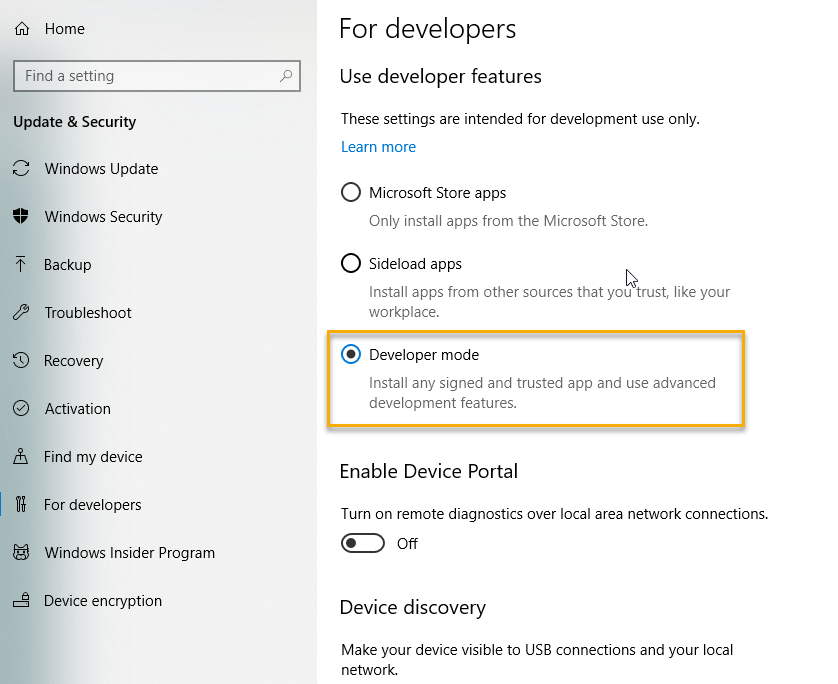
Turning on Windows Developer Mode
Turning on Windows Developer Mode allows for more transparency into unsigned applications. You can access this setting in Windows 10 from Windows Settings > Update & Security > For developers:
Step 2 (optional): Using Accessibility Insights to identify objects in native applications
Now that you have your WinAppDriver set up, you may need some help in identifying the specific objects or components within the native app that you want Cycle to target. Windows Accessibility Insights is a program that can be very helpful for this purpose.