Creating a Plugin Project
Cycle Labs provides the Java Plugin SDK for developing plugin projects using the Java programming language. Java plugin projects use Maven for builds and Spring Boot for API endpoints. For convenience, Cycle Labs provides a command in VS Code for creating new Java plugin projects with the SDK, Maven, and Spring Boot components prepared as boilerplate code. The plugin author simply needs to be aware of the project structure before adding step specs and definitions. Each plugin should have its own project, separate from a Cycle test project. Each plugin project should be developed with the best practices of any software project: version control, coding standards, automated tests, etc.
You will need JDK 21 or higher as well as Apache Maven to build and run plugin projects.
Creating the project in VS Code
The Cycle Testing VS Code Extension includes a command to create a new Java plugin project with all the structure and boilerplate code ready to go. There are two ways to access the command.
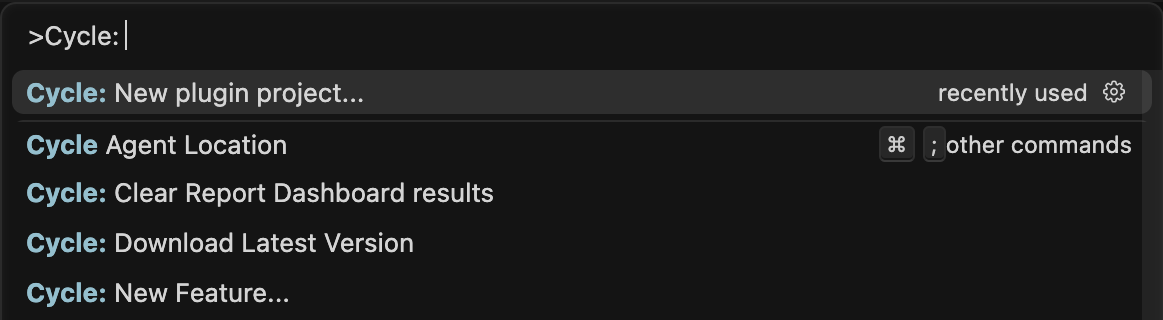
One way is through the Command Palette. Open the Command Palette by typing F1 or Ctrl-Shift-P, and enter the command Cycle: New plugin project...:
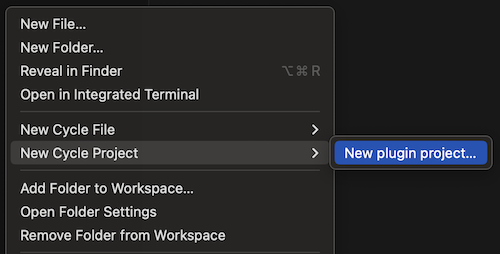
The other way is through the Explorer context menu. Right-click anywhere in Explorer, and then select New Cycle Project > New plugin project... in the context menu:
VS Code will then ask you for a name for the plugin. Give it a name that reflects what the steps do. Don't add the word "Plugin" to the end of the name. For example, the plugin could be named "Pluginator":

VS Code will also ask you for a Java parent package name. Conventionally, this name should be your company's domain name in reverse. For example, the parent package name for Cycle Labs would be io.cyclelabs. However, this is not required, and the parent package could be anything you wish.

When VS Code creates the project, it will append the lowercase version of your plugin name to this package. So, in this example, entering io.cyclelabs for the parent package name will create a project where all the Java code will appear under io.cyclelabs.pluginator.
Next, VS Code will prompt you for a project directory using a file picker prompt. Select a new, empty directory. VS Code will generate the project files directly into this directory.
Once you select a project directory, VS Code will generate all the plugin project files under it. Finally, VS Code will issue a notification asking if you want to open the new project. Select "Open Project", and VS Code will open the project in the current window.

Building and running the project
You should be able to successfully build and run the project with no errors immediately upon its creation. Since it is a Maven project, it uses Maven's Build Lifecycle with phases like compile, test, and package. To build the project, run the following command from the command line in the project's root directory:
mvn clean compile
The command should run successfully with no errors. Near the bottom, the output should say BUILD SUCCESS. Compiling the project will generate a target output directory.
To run the project, run:
mvn spring-boot:run
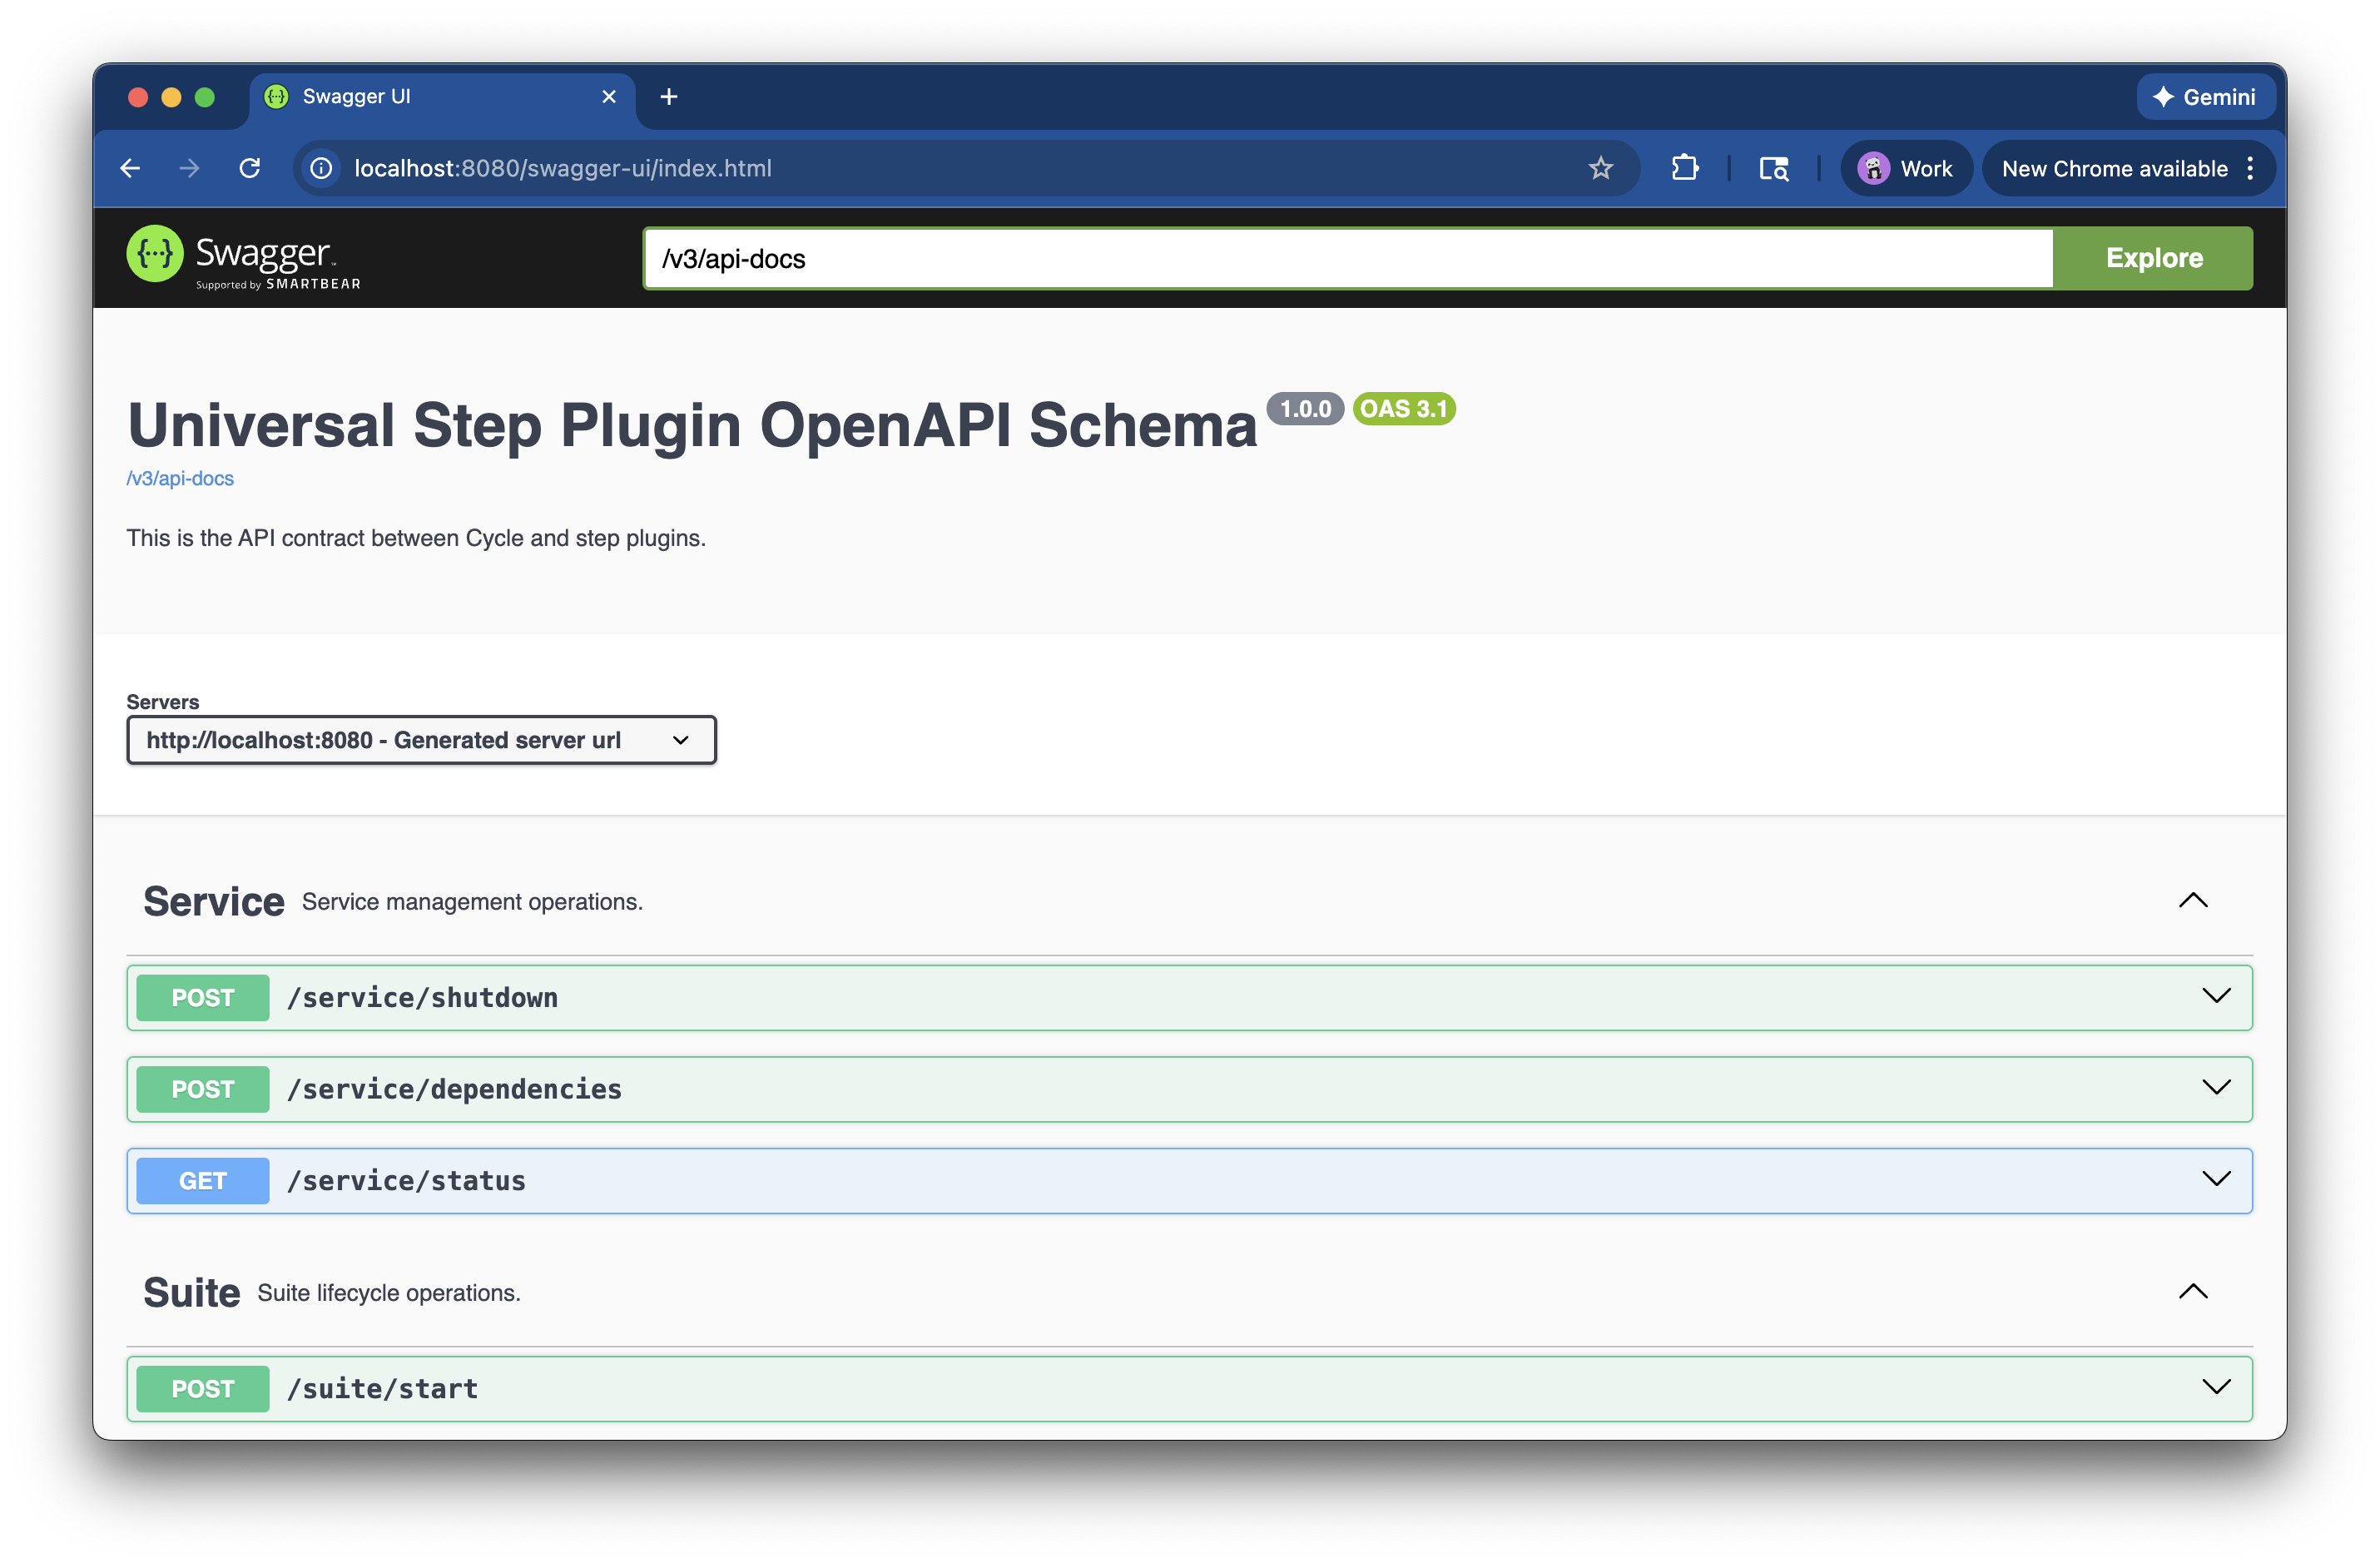
This will run the Spring Boot application, and the plugin's endpoints should be active. You should be able to load http://localhost:8080 in a web browser to see the OpenAPI schema for the service:
Enter Ctrl-C at the command line to stop running the plugin.
Reviewing the project files
The newly created plugin project will be a Java Spring Boot application built using Maven. It should have a file structure that looks like this, which follows Maven's Standard Directory Layout:
<project-directory>
├── CHANGELOG.md
├── README.md
├── pom.xml
└── src
    ├── main
    │   ├── java
    │   │   └── <parent-package-name>
    │   │       └── <plugin-name>
    │   │           ├── <PluginName>PluginApplication.java
    │   │           ├── fixtures
    │   │           │   ├── <PluginName>ScenarioFixture.java
    │   │           │   └── <PluginName>SuiteFixture.java
    │   │           └── steps
    │   └── resources
    │       ├── application.properties
    │       ├── settings.yml
    │       └── steps.yml
    └── test
        ├── java
        └── resources
CHANGELOG.md
This Markdown file is a changelog in the spirit of Keep a Changelog. Every time you make changes to your plugin, you should increase the version and enter change details in this changelog file. The recommended version strategy is semantic versioning.
README.md
This Markdown file is a README for the project. It should document what the plugin does, how to develop it, and whatever other information would be valuable to a plugin developer. Initially, the README has a TODO list for the plugin author and a list of commands for building, testing, and running the project. You should update its contents as the project progresses.
pom.xml
The Project Object Model is the main configuration file for Maven. It lists all the project's information and dependencies. The most notable dependency is the Java Plugin SDK. When VS Code creates the plugin project, it populates it with boilerplate configurations and dependencies. You will probably need to edit this file only to increase version numbers and add/update dependencies.
src/main/java
This directory contains all Java code in a Maven project (excluding test code). VS Code will create a Java package under this directory based on the package parent name and plugin name provided during project creation.
<PluginName>PluginApplication.java
This is the main class for Spring Boot. It is boilerplate. You should not need to edit it.
fixtures
This package contains the scenario and suite fixture classes:
- Edit the
<PluginName>ScenarioFixtureclass to add plugin setup and cleanup logic for each scenario. - Edit the
<PluginName>SuiteFixtureclass to add plugin setup and cleanup logic for each suite.
Do not delete these classes. The Java Plugin SDK requires both of them to exist, even if their methods are empty.
steps
This package is where step definition classes should be added. Initially, this package is empty because a new project does not yet have any step definitions.
src/main/resources
This directory contains resource (non .java) files for the project:
application.propertiesis a Spring Boot properties file. You can leave it alone.settings.ymlis the settings file for the plugin. Its initial content is boilerplate, but you will need to edit the version and perhaps the dependencies.steps.ymlis the step spec file for the plugin. You will need to write all the step specs in this file.
src/test
This directory contains all the test code for a Maven project. You will need to add unit and integration tests for the plugin under these directories. Like src/main, Java code goes into src/test/java while all other files go under src/test/resources. Initially, these subdirectories are empty.