Cycle-CLI (Command Line Interface) Execution
Cycle allows you to run a Feature File or playlist from the command line. Combining this functionality with a Continuous Integration or Continuous Testing process allows for the execution of tests at a preset or recurring time.
To execute Cycle from the command line:
- At the command prompt, navigate to the directory where the
cycle-cli.exefile is located (typicallyC:\Program Files (x86)\CycleLabs\Cycle). - Run
cycle-clifollowed by any optional parameters, with the last parameter being the name of the Feature File or playlist to be executed.- If you are running
cycle-clifrom a machine where you do not also run the Cycle UI (such as in a CI/CD pipeline), you need to use the--tokenargument to provide a valid token for authentication. Inject this as an environment variable for security. See the Obtaining a token section below for details. - By default,
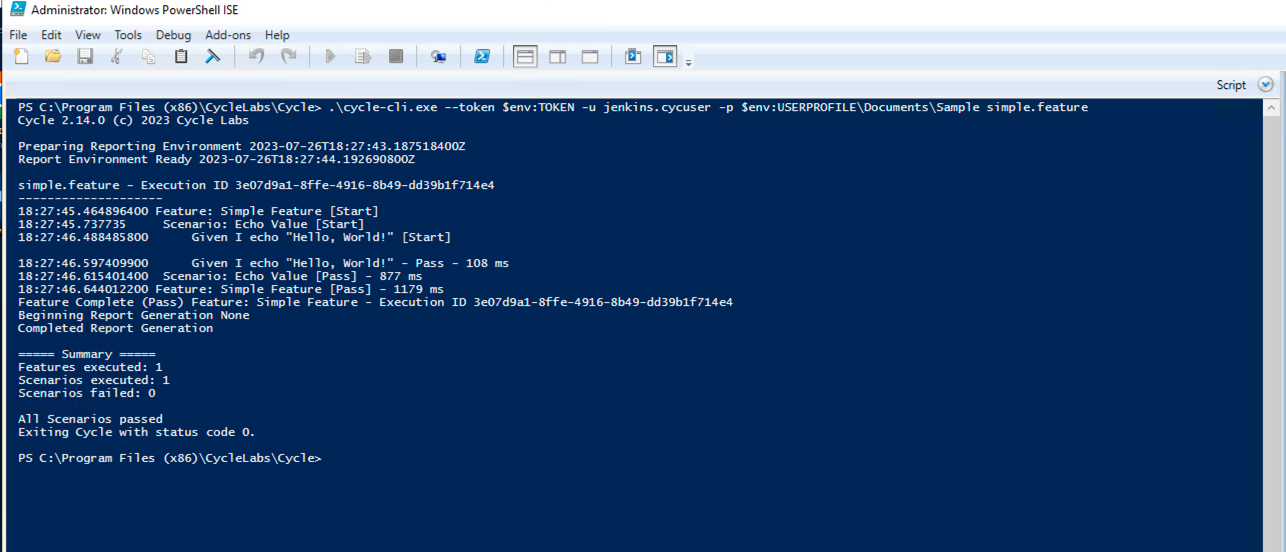
cycle-clilooks for a.cycuserfile that matches the user that you logged into Cycle 2 with when you obtained the token. For example, if you logged in asj.doe@cyclelabs.io, it looks for aj.doe.cycuserfile. If you use a more generic.cycuserfile in your pipeline to store settings required for your pipeline tests to run successfully (for example,jenkins.cycuser), you can use the-u(--user-profile) argument to specify the.cycuserfile to use.
- If you are running
Example 1: cycle-cli --output-directory C:\Cycle\Output --project-file MyProject.cycproj webtest.feature
Example 2: cycle-cli --project-file MyProject.cycproj terminal.feature web.feature sql.feature
This would run each of the three Feature Files sequentially.
If your Feature File includes steps that prompt the user, these steps are skipped.
You can also delegate cycle-cli runs to a connected AI coding agent (Claude Code, Cursor, GitHub Copilot, and so on) using Cycle's MCP server.
The agent authors, validates, runs, and inspects failures structurally on your behalf.
See Cycle MCP.
Obtaining a token
Applicable for Cycle 2.14 and beyond
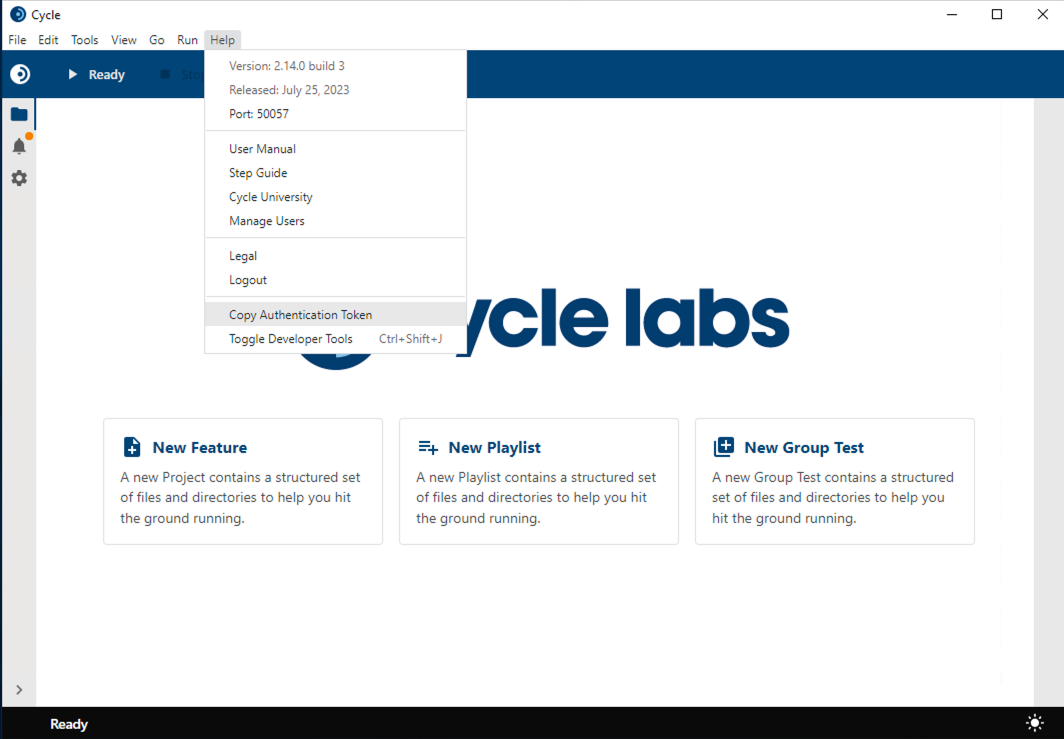
To obtain a token for use with cycle-cli, open the Cycle UI and navigate to Help > Copy Authentication Token.
This copies a token to your clipboard that you can then inject into your CI/CD pipeline as an environment variable.
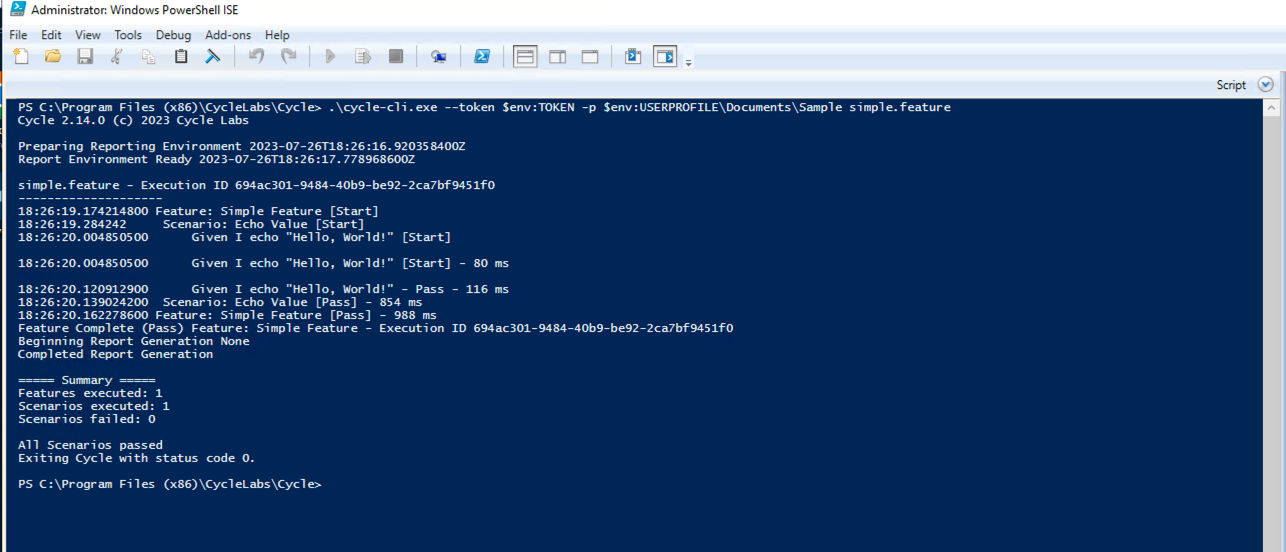
Below are examples of running cycle-cli with the --token argument and with both the --token and -u (or --user-profile) arguments from PowerShell:
Authentication using Client Credentials OAuth2 flow
This section provides step-by-step instructions for setting up and using the Client Credentials OAuth2 Flow in the Cycle platform. This flow allows you to authenticate against your Cycle subscription independently within a pipeline, using client credentials instead of a token associated with a specific team member.
Step 1: Creating a client
- Log into the User Portal:
- Open your web browser and navigate to the Cycle User Portal.
- Enter your credentials to log in.
- Access Application Secrets:
- Once logged in, locate and click on the Application Secrets option in the user portal.
- Create a new client:
- Within the Application Secrets section, find the clients section in the left pane.
- Click the + button next to the clients section.
- A modal appears prompting you to enter a client name of your choice.
- Enter the desired client name and click OK to confirm.
- After creating the client, Cycle Labs still needs to authorize the client with the identity provider before you can use it to authenticate with
cycle-cli. Email help@cyclelabs.io with your new client name and ID before using it withcycle-cli. Do not send any client secrets in the email.
Step 2: Generating a client secret
- Adding an application secret:
- After creating the client, click the Add Secrets button located in the top right corner of the screen.
- Name your secret:
- In the modal that appears, enter a name for your application secret.
- Press OK to confirm.
- Copy your secret:
- Once the secret is generated, use the copy button provided to copy the generated secret.
This is the only time you will have access to the secret in user management.
- Securely store your secret:
- Store the secret in a secure location, such as a Key Vault or password manager.
- Ensure that only authorized personnel have access to this secret.
Step 3: Authenticating in Cycle CLI
- Run Cycle 2:
- When running Cycle 2 commands, you need to use the Client ID (displayed next to the Add Secrets button in user management) and the client secret.
- Using Cycle CLI:
- When running
cycle-clicommands, include the following arguments:--clientid: Provide the Client ID associated with your client.--client-credential: Enter the client secret obtained earlier.
- Alternatively, you can use the
--settingsflags to explicitly set options, or use the-sor--settings-fileflags to provide a file with your desired settings. - When accepting the defaults by not using a
-u,--settings,-s, or--settings-fileflag, Cycle has the following behaviors:- Results are only sent to the report service.
- No other reports are generated and no data is sent to the data store.
- No web driver or winapp driver locations are set.
- No stored credentials exist.
- No custom output directory is set.
- No KnownHostsLocation file is set.
- When running
By default, cycle-cli looks for a .cycuser file that matches the user that you logged into Cycle 2 with when you obtained the token.
When using client-credential with cycle-cli, you are not authenticated as a specific user, but rather authenticated against your subscription.
Since you are not authenticated as a specific user in this case, if you are going to utilize a .cycuser file to override any of the default settings, you must use the -u or --user-profile flag to specify the .cycuser file that contains the desired configuration.
- Integration into a pipeline:
- You can now authenticate against your Cycle subscription within a pipeline using client credentials.
- Ensure that you inject your client secret as an environment variable into your pipeline job from your chosen secure storage (Key Vault or password manager).
- Never hard-code your client secret into your pipeline code, as this poses a security risk.
By following these steps, you can set up and use the Client Credentials OAuth2 Flow in the Cycle platform for secure authentication within your pipelines. If you encounter any issues or have further questions, refer to the Cycle documentation or reach out to the support team for assistance.
Managing your secrets
In addition to creating application secrets, you can also manage them within the Cycle platform. This section outlines how to delete existing secrets and create new ones, as well as how to access hints and expiration dates for your secrets.
Deleting a secret
- Access Application Secrets:
- Navigate to the Application Secrets section within the Cycle User Portal.
- Locate the secret:
- Scroll through the list of existing secrets to find the one you wish to delete.
- Delete the secret:
- Next to the secret you want to remove, click the appropriate action button (often represented by a trash can or delete icon).
- Confirmation:
- Confirm the deletion when prompted.
- This action is irreversible.
Creating a new secret
- Access Application Secrets:
- Follow the steps outlined in the previous section to navigate to the Application Secrets section.
- Generate a new secret:
- Click the + New Secret button or similar option, depending on the interface.
- Name your secret:
- Provide a name for the new application secret.
- Save the secret:
- After naming your secret, save it within the platform.
- The new secret is generated and added to your list of application secrets.
Accessing secret information
- Hint and expiration date:
- In the list of application secrets, you see a hint of the first three characters of each secret.
- Additionally, the expiration date of each secret is visible, providing information on when the secret will no longer be valid.
- Hint utilization:
- The hint serves as a reference point to help identify each secret, especially if you have multiple secrets stored.
- Expiration date awareness:
- Be mindful of the expiration date of your secrets.
- If nearing expiration, generate a new secret and update your applications accordingly to ensure uninterrupted access.
By following these guidelines, you can manage your secrets within the Cycle platform, ensuring security and access control over your application secrets. If you have any questions or require further assistance, refer to the Cycle documentation or contact the support team for help.
Managing the token in a pipeline
Best practice is to never hard-code your token into a pipeline job or other use of cycle-cli.
Rather, inject it as a secret or environment variable.
If you are running cycle-cli in Jenkins, store the token as a secret or utilize the Credentials Plugin.
If you are running cycle-cli in an Azure DevOps pipeline, store the token as a secret variable or in Azure KeyVault.
Note that the token has a lifetime of 90 days from when it is generated. Update the secret or environment variable regularly to avoid any disruption to your automation as a result of letting the token expire.
Running cycle-cli in parallel
Applicable for Cycle 2.14 and beyond
Cycle uses an embedded H2 database to store execution results for reporting.
This embedded database creates files in your APPDATA directory with a .db extension.
These files are deleted automatically when Cycle is gracefully shut down.
To handle a situation where any .db files were orphaned due to a forcible quit of Cycle, at start up Cycle tries to delete any unused .db files.
This can lead to challenges when trying to run multiple instances of cycle-cli in parallel, where one instance of cycle-cli attempts to delete the .db files used by another instance of cycle-cli on the same machine.
To avoid this situation, cycle-cli supports a --skip-initial-purge argument.
When using this flag, cycle-cli does not attempt to delete any .db files at start-up, avoiding potential conflicts between multiple instances of cycle-cli.
Required parameters
| Parameter | Description | Example |
|---|---|---|
| Feature or Playlist | Path to Feature File or playlist | C:\path\to\feature\feature_name.feature or C:\path\to\playlist\playlist_name.cycplay |
Optional parameters
| Parameter | Description | Example |
|---|---|---|
--echo-settings | Echo the current settings to the console and exit | C:\Program Files (x86)\CycleLabs\Cycle>cycle-cli --echo-settings |
--env-file | Load environment variables from a custom .env file | cycle-cli --env-file "path/to/.env" [files to run] |
-e, --error-handling [arg] | Error Handling Strategy (examples below) | C:\Program Files (x86)\CycleLabs\Cycle>cycle-cli --error-handling ALL_TESTS [files to run] |
-l, --log-level [arg] | Logging level | cycle-cli --log-level verbose [files to run] |
--no-tick | Turn off time-elapsed update for steps | cycle-cli --no-tick [files to run] |
-o, --output-directory [arg] | Report output directory | cycle-cli --output-directory C:\Cycle\Output [files to run] |
-p, --project-file [arg] | Project directory (this must be a directory containing a .cycproj file). If the current directory is the project directory, then this argument is optional. Otherwise, it is required. | cycle-cli --project-file C:\Cycle\MyProject [files to run] |
--settings | Additional settings as key value pairs | cycle-cli --settings ProduceLocalReport=true [files to run] |
-s, --settings-file [arg] | Settings file location to override settings used in Cycle client | cycle-cli --settings-file C:\Cycle\settingsoverride.json [files to run] |
--skip-initial-purge | Skip attempting to clean up internal DB files at startup. This can be useful when running multiple instances of Cycle in parallel in a pipeline. | cycle-cli --skip-initial-purge [files to run] |
-t, --tags [arg] | Tags to be executed. For multiple tags, use multiple flags. | cycle-cli --tags receiving --tags picking [files to run] |
--token [arg] | Token for authentication (available since 2.14) | cycle-cli --token $TOKEN [files to run] |
-u, --user-profile [arg] | An alternate .cycuser file to use when executing tests | cycle-cli -u jenkins.cycuser [files to run] |
-x, --shutdown-timeout [int] | Forcibly terminate Cycle upon test completion (in seconds) (default -1) | cycle-cli -x 300 [files to run] |
-h, --help | Show help message | cycle-cli --help |
--version | Show Cycle version | cycle-cli --version |
Error handling strategies
Features
FEATURE = End Feature File execution
SCENARIO = Skip to next Scenario
Example: Cycle>cycle-cli --error-handling FEATURE palletpick.feature
Playlists
NONE = Skip to next Scenario
SINGLE_TEST = Skip to next Feature File
ALL_TESTS = End playlist execution
Example: Cycle>cycle-cli --error-handling SINGLE_TEST listpick.cycplay
Group tests
NONE = Stop Failed Terminal
SINGLE_TEST = Stop Failed Group
ALL_TESTS = End group test execution
Example: Cycle>cycle-cli --error-handling ALL_TESTS volumetest.cvt
Project file parameter
This can be either the project directory or the .cycproj file.
For example, if a user has a project in c:\users\MyUser\myproj, either c:\users\MyUser\myproj or c:\users\MyUser\myproj\myproj.cycproj would be acceptable arguments to follow the --project-file parameter.
This can be an absolute path or relative path.
If this argument is not used, cycle-cli looks for a .cycproj file in the current directory.
So in the command line, if the user changes directory to MyUser\myproj, they would not have to use the --project-file argument.
Cycle-CLI results
When cycle-cli executes, the step results are output to the command line.
Steps that pass are output with a Pass and the number of ms they took to complete.
Steps that failed are output with [Fail].
cycle-cli completes with the line Feature: Feature Name [Fail COP[Pass] - {number} ms.
Any of the reporting formats available to the main Cycle client can be generated if the respective settings are applied.
Replicating settings
In many cases, cycle-cli is run on a different computer than Cycle itself.
It is important for teams to carefully control what settings are in use when running cycle-cli.
It is possible to replicate the needed settings by specifying a project file for your cycle-cli execution.
All of the pertinent execution settings are included in the .cycproj file.
In addition to this, if there are a few specific settings that need to be overridden for a cycle-cli execution, they can be saved as "key":value pairs in valid json objects and loaded in for a given execution using the --settings-file parameter.