Recording a Test
Chrome provides a web recorder as part of its standard Developer Tools (or "DevTools"). The Cycle Chrome Recorder extension enables testers to export recorded web tests to CycleScript feature files. This page explains how to use the Chrome Recorder to record a test. The following page explains how to export a recorded test to CycleScript. For general information on the Chrome Recorder, please review Google's full documentation.
Opening the recorder
Start by opening Chrome DevTools:
- Navigate the browser to the page to test.
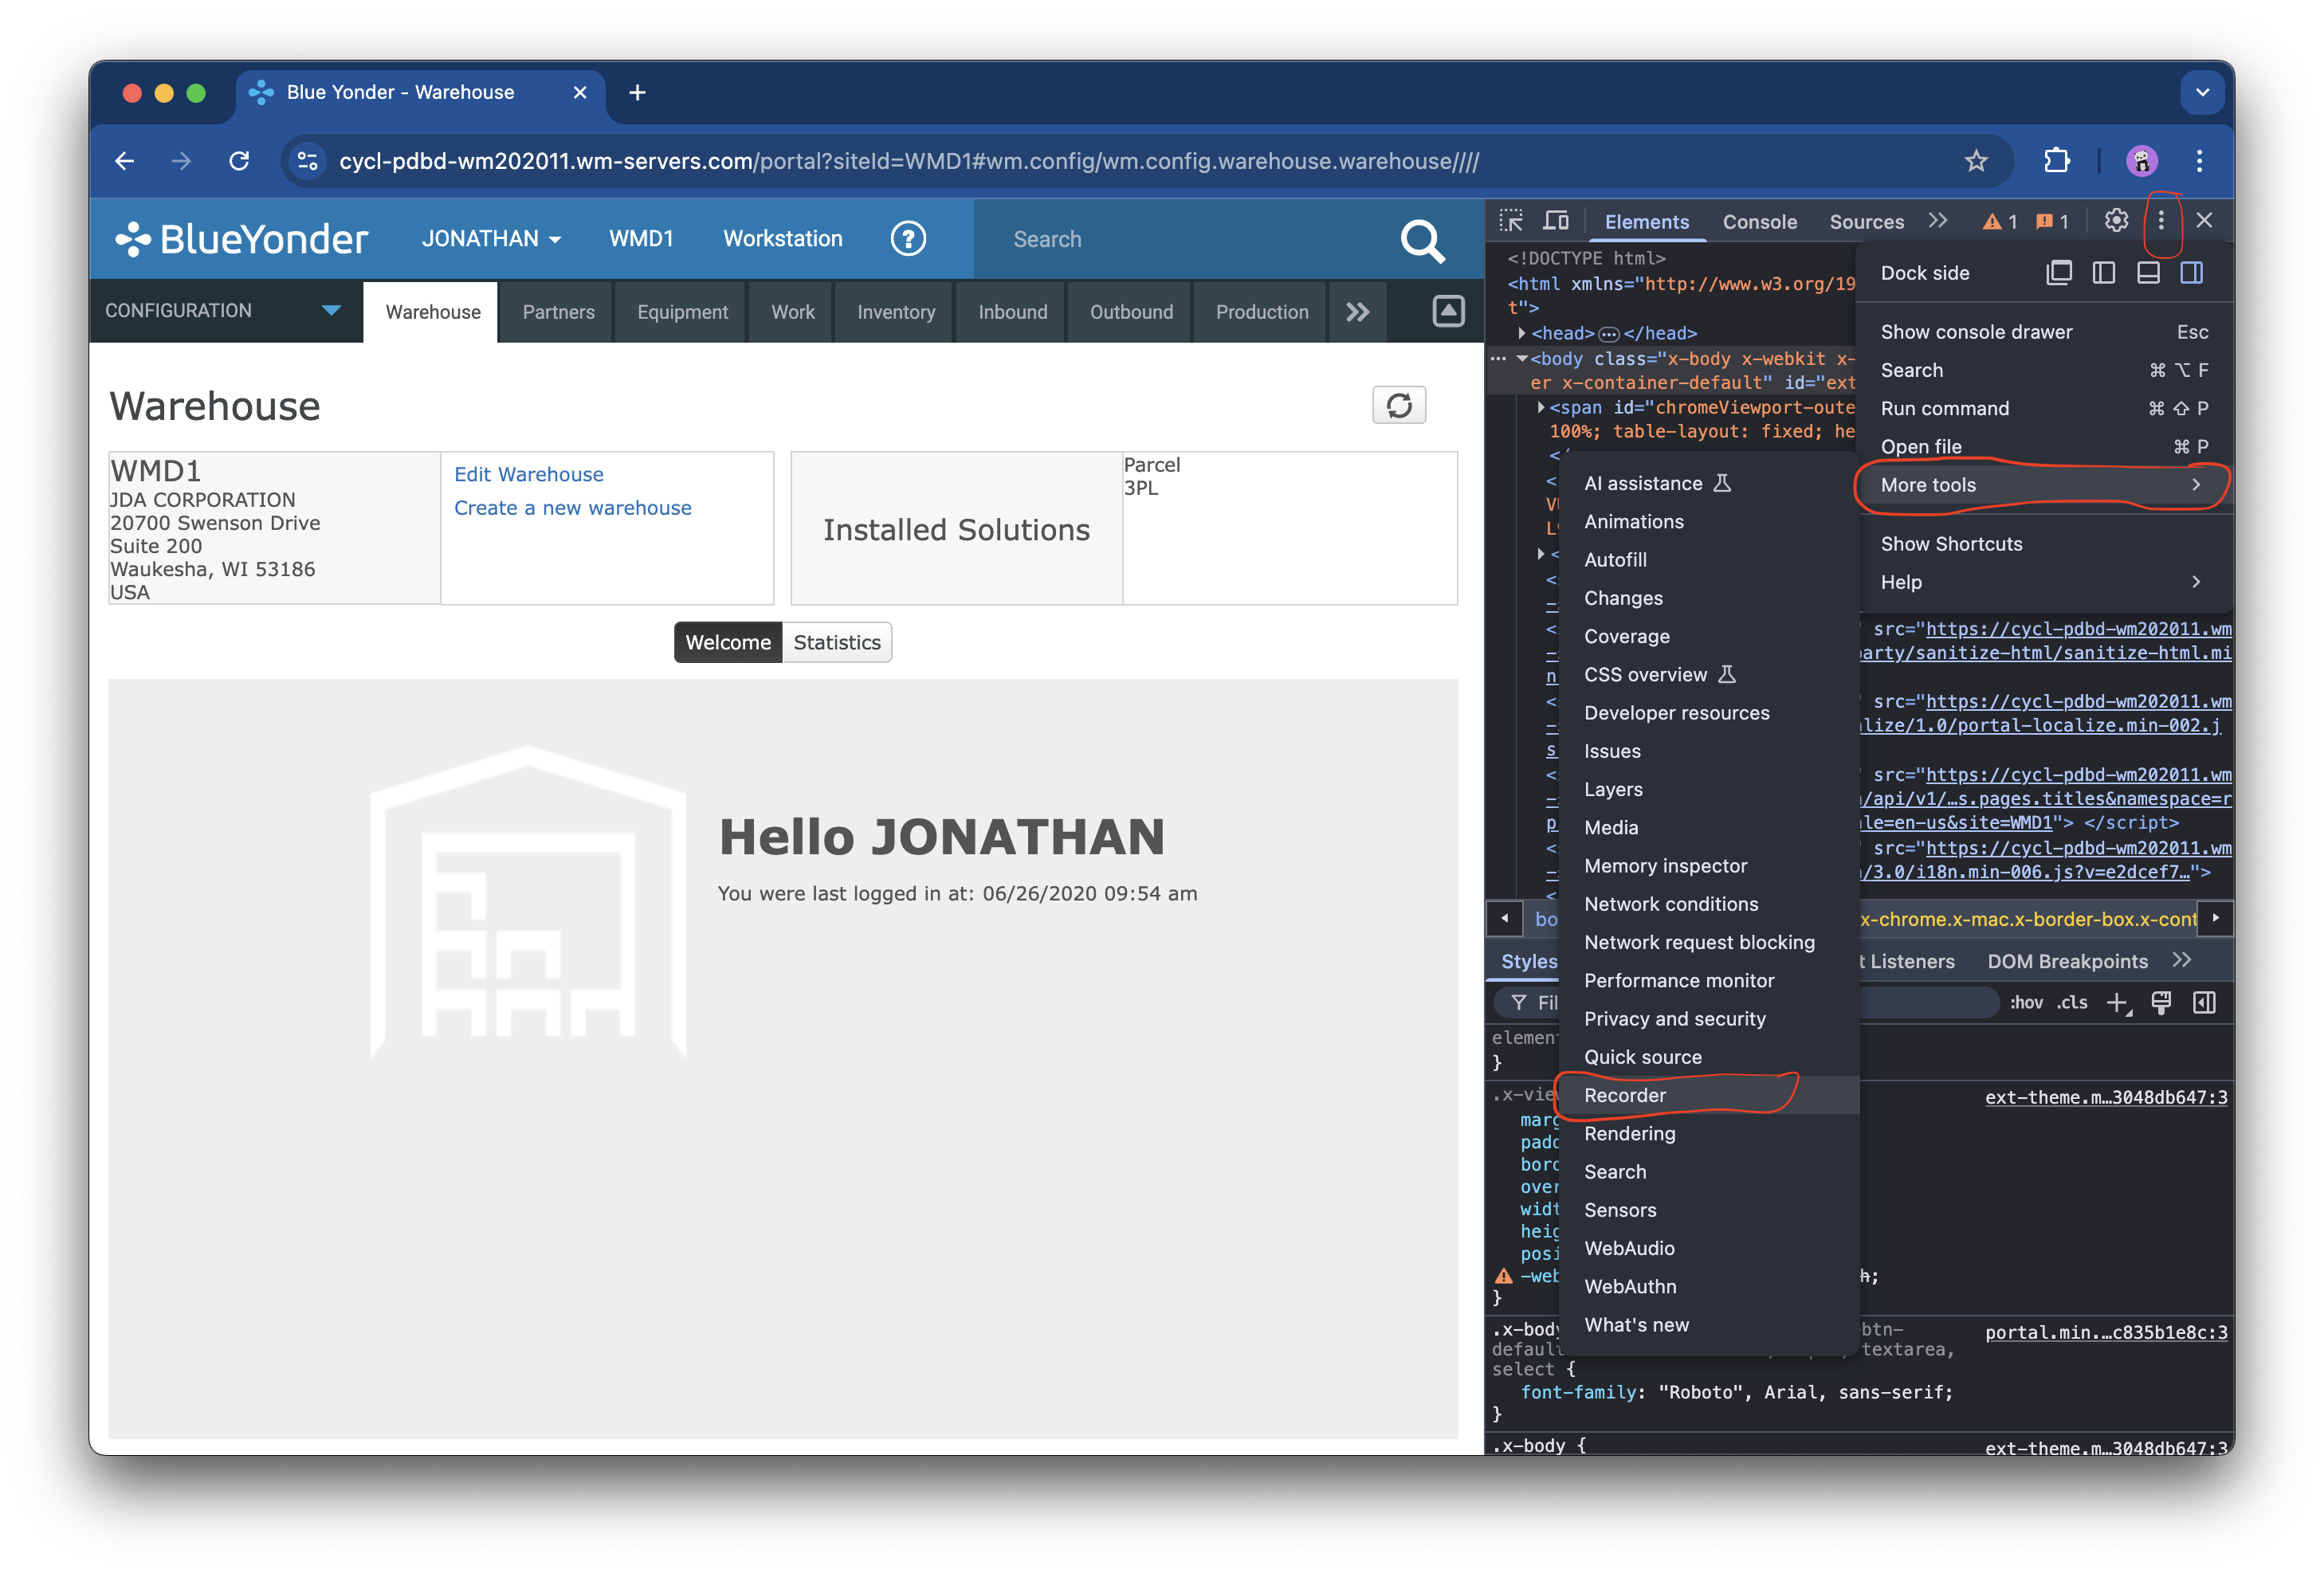
- Click the three dots in the upper-right corner of the browser header.
- Select "More Tools" -> "Developer Tools".

The DevTools view should open either on the side of the browser or in a new window:
- Click the three dots in the upper-right corner of the DevTools view.
- Select "More Tools" -> "Recorder".
Recording a test
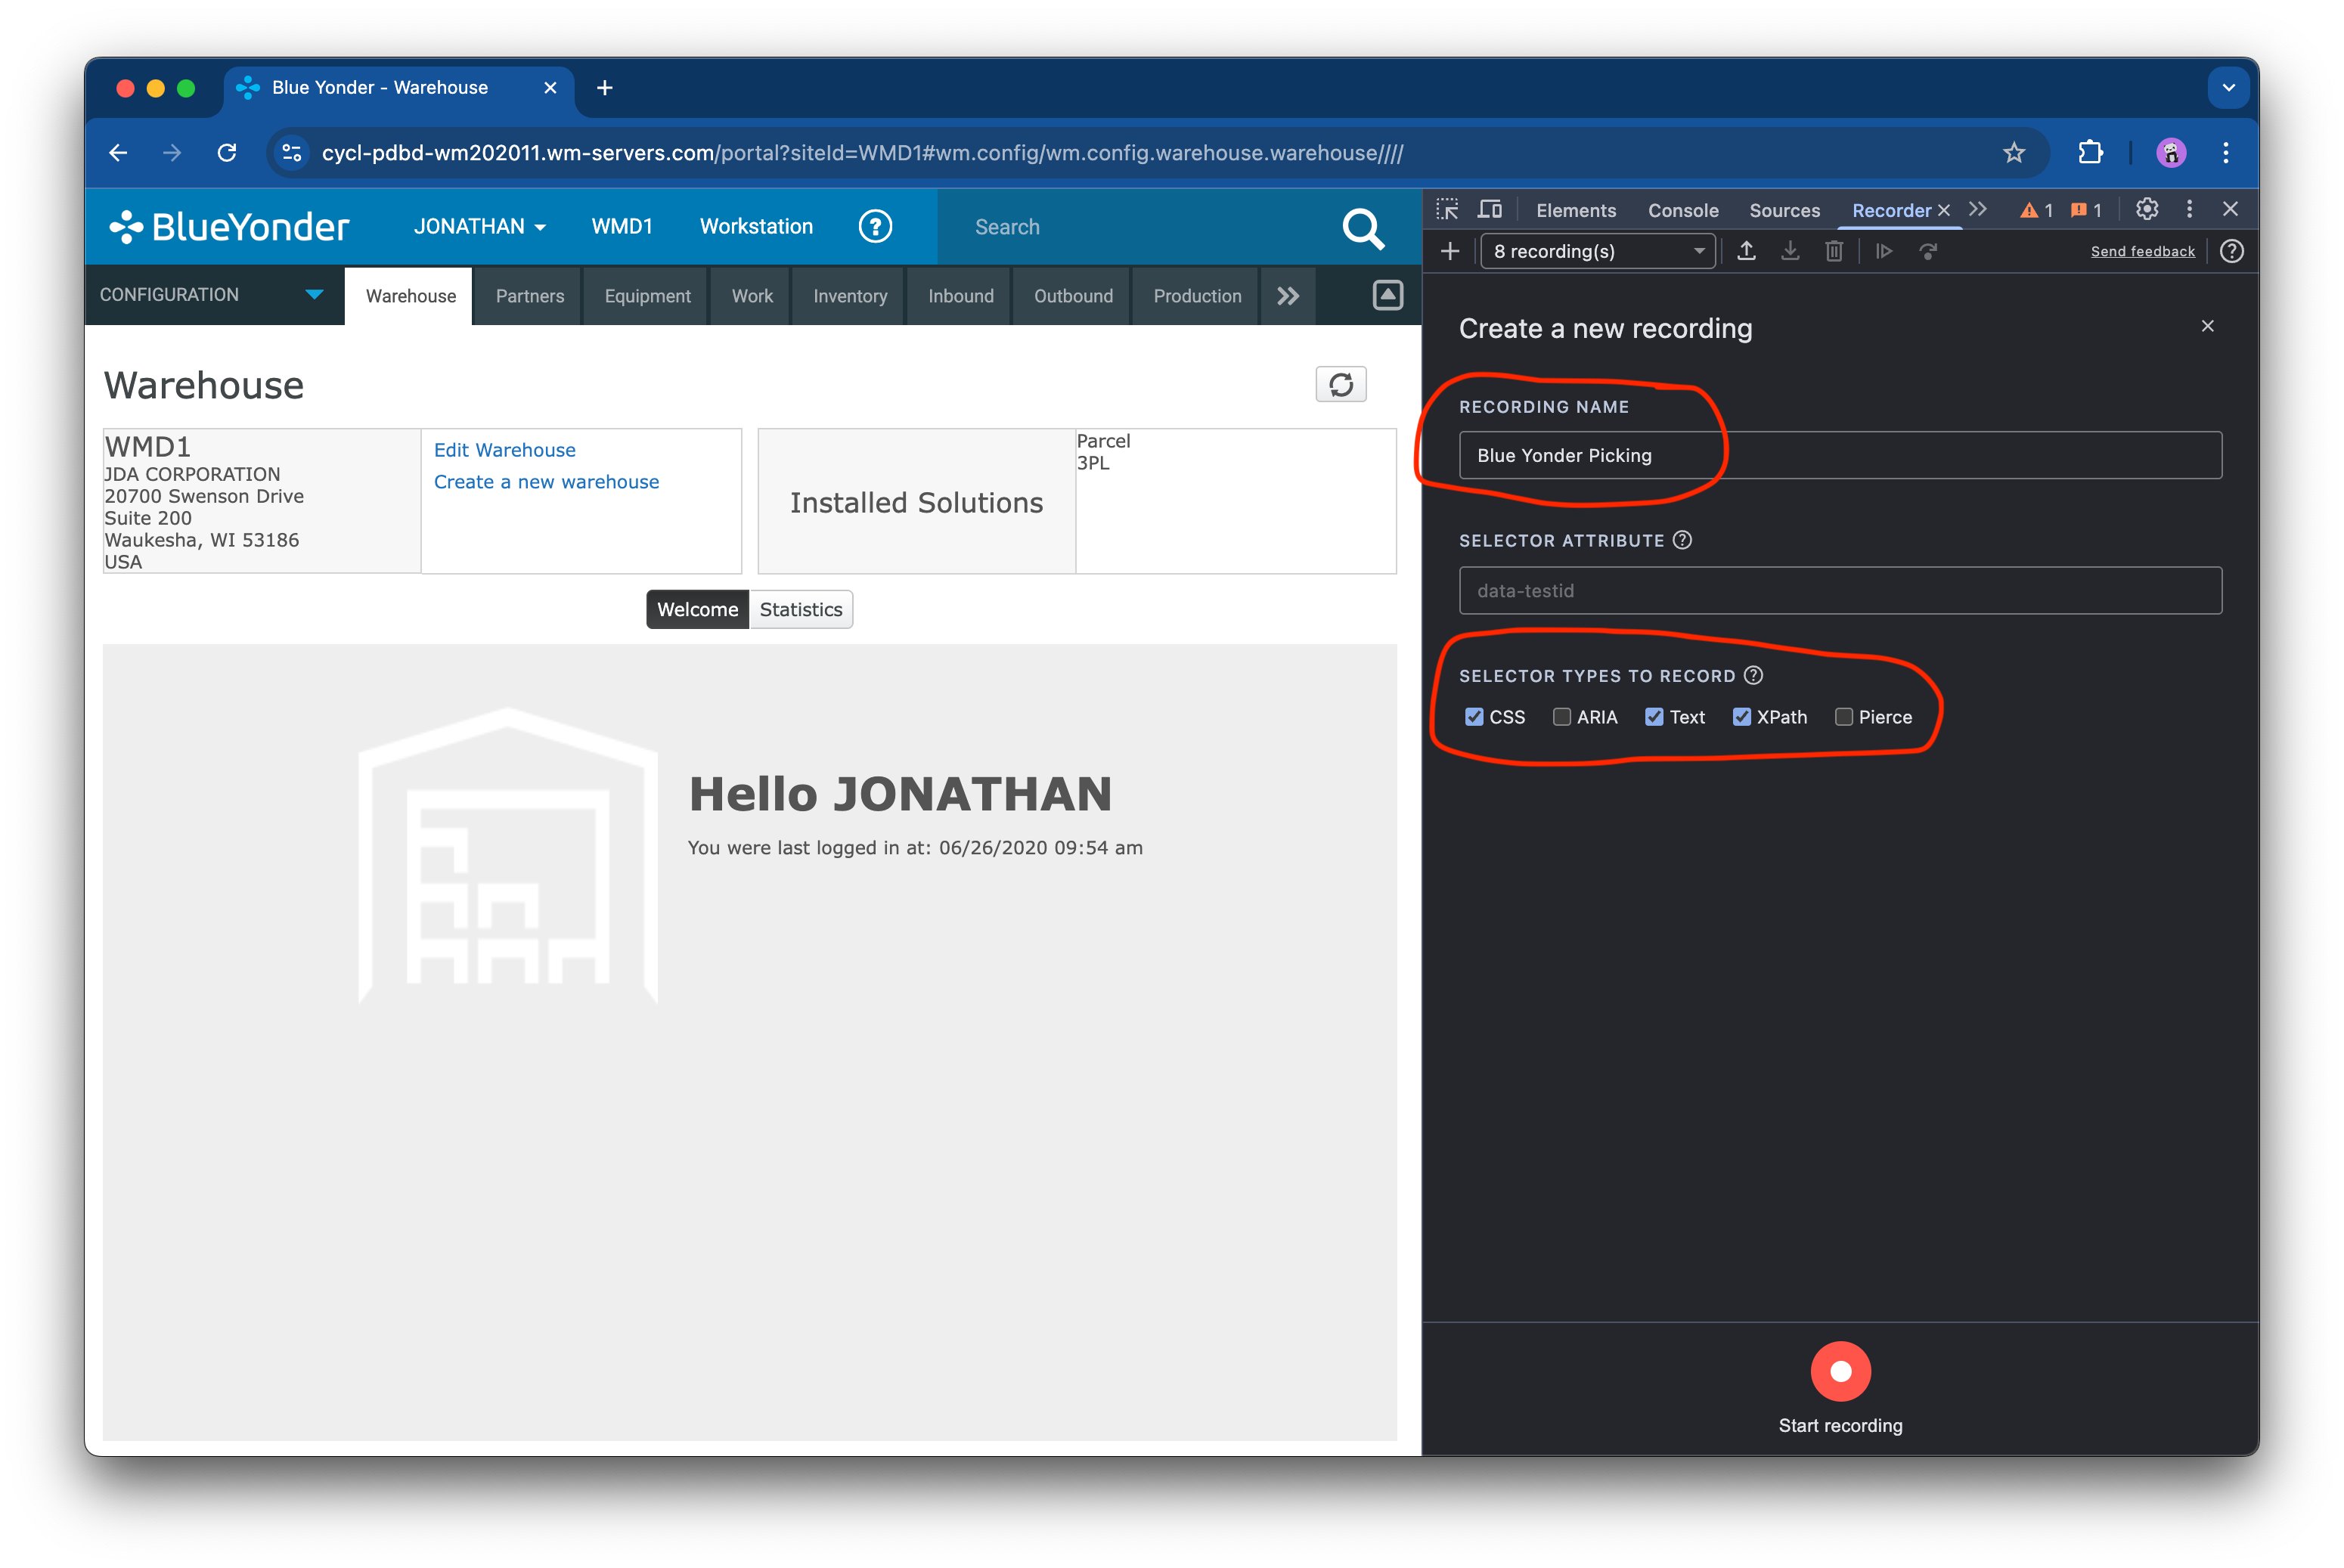
In the Recorder view, click the "Create a new recording" button. Under "Recording Name", provide a unique name for the test.
Then, under "Selector Types To Record", de-select ARIA and Pierce. Cycle does not use ARIA or Pierce locators, and the recorder can exhibit sluggish performance if they are selected.
Click the "Start recording" button to start the recording session.
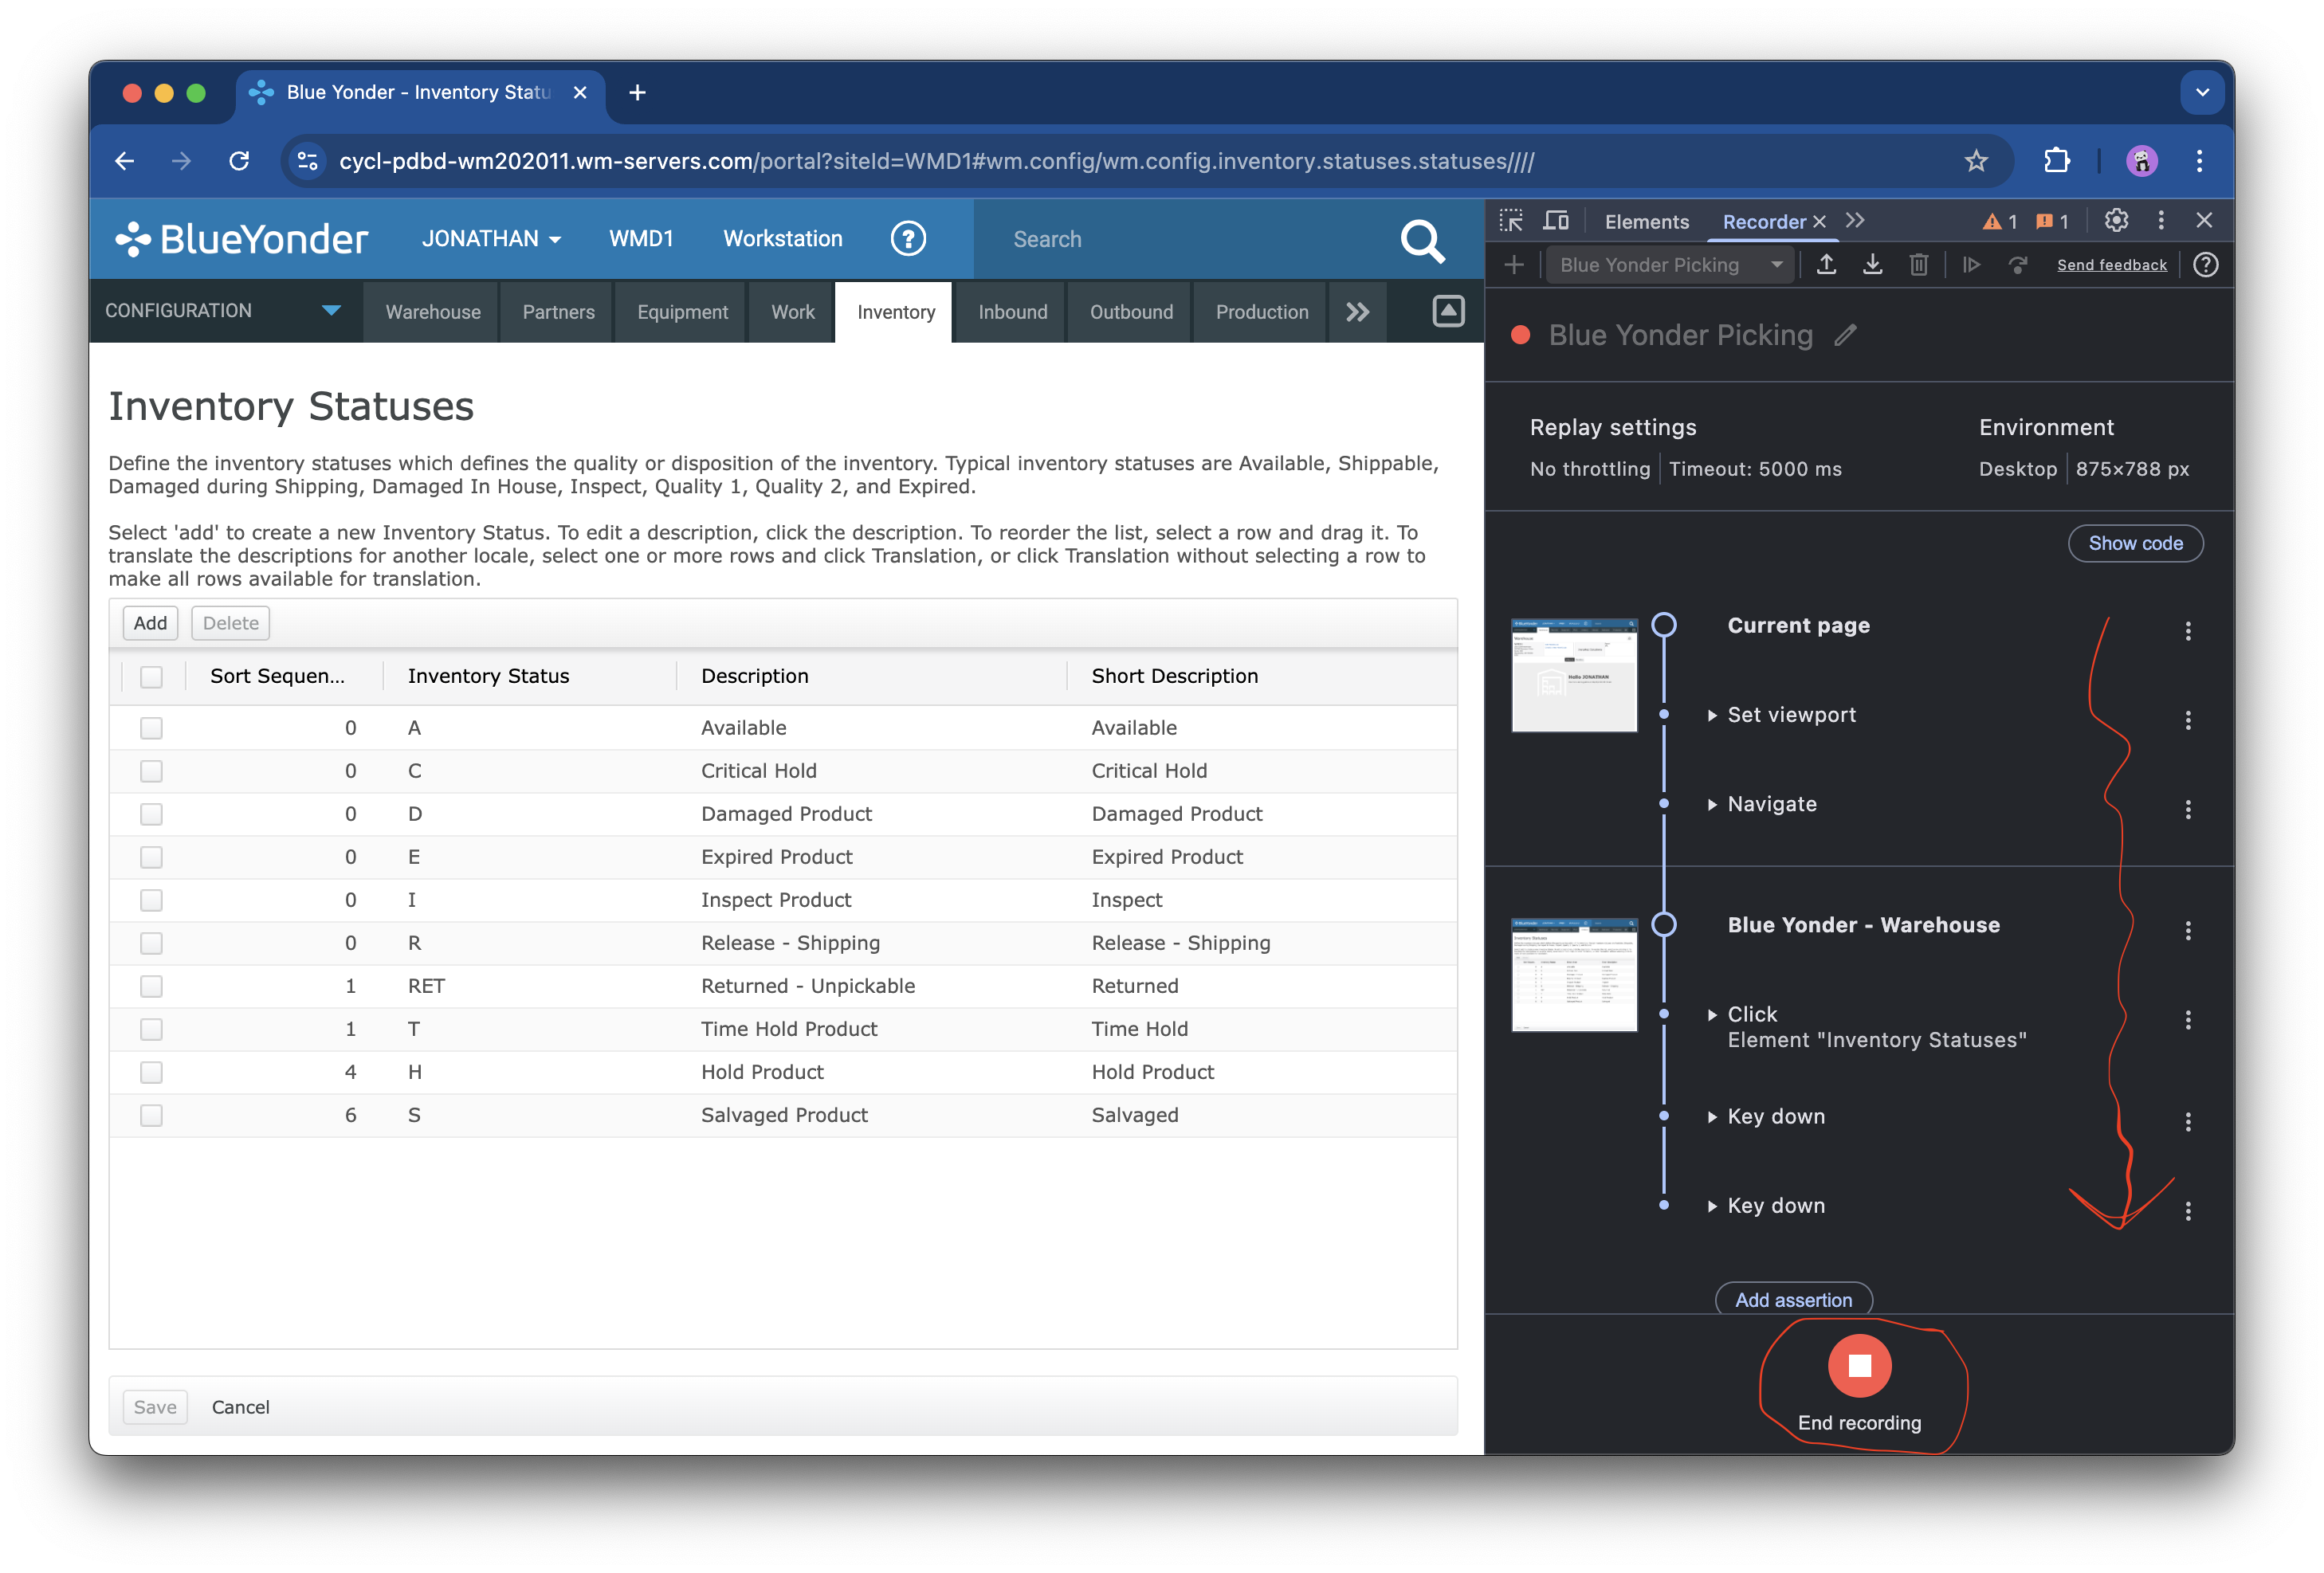
Once the recording has started, interact with the web page as if you are running a test manually. The recorder will capture all interactions made with the page and display them as steps in the Recorder view. Perform all steps for the test case. Once the test is complete, click the "End recording" button.
Warnings while recording
- New interaction steps cannot be added to the recording after it is ended. Make sure you capture all required steps while recording is active, or else you will need to re-record the entire test.
- The recorder does not capture text that is pasted into an input field (for example, with
Ctrl-V). You will need to type inputs explicitly on the page or edit the steps after the recording session is complete.
Editing the recording in Chrome
Chrome stores the recordings locally within the browser. Testers can export recordings into multiple kinds of formats: Puppeteer scripts, JSON files, and even CycleScript feature files with the Cycle Chrome Recorder extension. However, initial web recordings often have small issues, like unnecessary steps or poor waiting. It is good practice to review recordings and edit them in Chrome before exporting them. The sections below provide editing recommendations.
Removing unnecessary steps
Sometimes, the recorder captures extra steps that are unnecessary and may even cause problems during replay. For example, if you click on an input field and then enter text into it, the recorder will register a step for the click and a step for entering the text, even though the clicking step is not required.
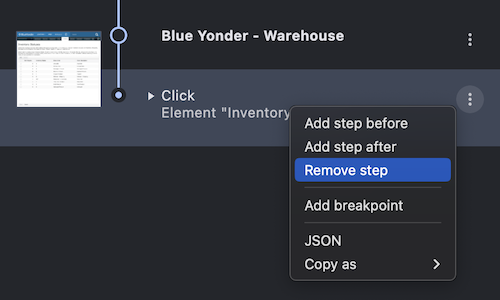
After recording a session, review its steps and remove any that are unnecessary. To remove a step, click on the triple-dot icon to the right of the step, and select the "Remove step" option.
Adding timeouts to steps
By default, steps are not assigned explicit timeout values. You can set an explicit timeout by expanding the step and clicking the "Add timeout" button at the bottom. The units for the timeout values are milliseconds.
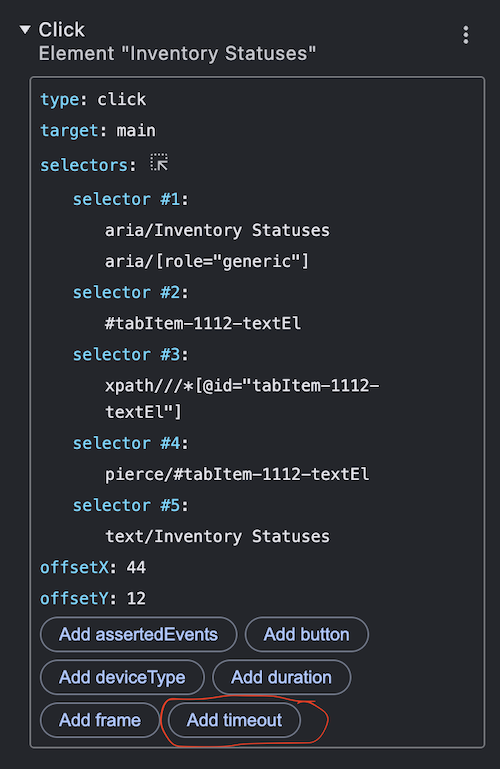
If a step is given an explicit timeout value, then the CycleScript step for it will be given the within X ms suffix.
Otherwise, the CycleScript step will use Once instead of When to handle waiting implicitly.
Adding waiting steps
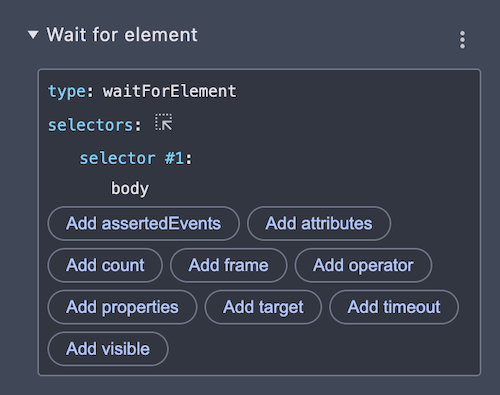
The recorder allows you to add verification steps to wait for elements to appear on the page. These must be added after the recording has ended. To insert a waiting step, click on the triple-dot icon to the right of a step where you wish to insert the waiting step, and select either "Add step before" or "Add step after".
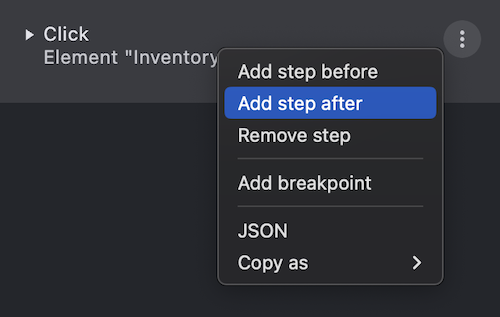
The recorder will insert a new step entitled "Wait for element". You will need to pick a selector for the element for which to wait. You can also add a timeout or an attribute to verify, and they will be translated into CycleScript.